by AGParts Education | Acer, Announcements, Asus, Chromebooks, HP, Samsung
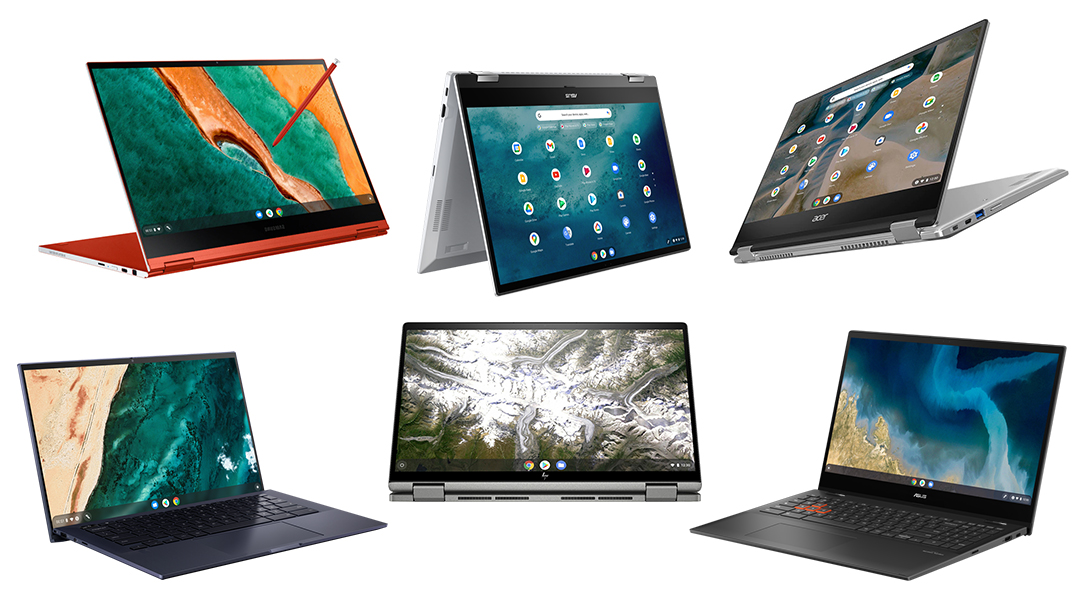
The Chromebook has been making waves since it was first introduced in 2011. What started as the leanest of laptops has transformed into high-performing machines attracting more users with flashy and premium models. Here’s a look at the latest models introduced from late 2020 to Spring 2021.
Acer Chromebook Spin 514

Photo Credit: Acer
Released: February 2021
Price Range: Less than $500
Processor: AMD Ryzen 3 2.6 GHz
Battery: 10 hours
Memory: 4GB
Storage: 64GB
Screen: 14”
Resolution: 1920 x 1080
Convertible: Yes
Weight: 3.42 lbs
The most powerful Chromebook that Acer has released, the Acer Chromebook Spin 514 (CP514-1H-R4HQ) is the first Acer Chromebook to feature AMD hardware. While it easily rivals a Windows 10 laptop in hardware, its price tag is still more affordable than Windows 10 laptop with similar specs. It’s heavier than most Chromebooks and feels more like a traditional laptop. Fully convertible, this Chromebook is great for business-minded power users.
There are two additional models in this series that have been announced but have not been released yet.
Asus Chromebook CX9
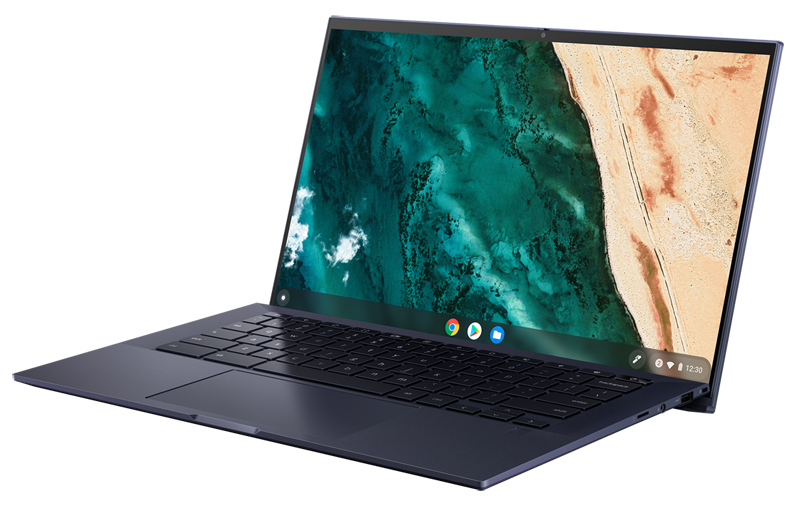
Photo Credit: Asus
Announced: January 2021 (not released)
Price Range: Not available
Processor: Intel Core i3 to i7
Battery: 10 hours
Memory: 8GB-16GB
Storage: 256GB-512GB SSD
Screen: 14”
Resolution: 1920 x 1080
Convertible: No
Weight: 2.31 to 2.98 lbs
The Asus Chromebook CX9 is designed to perform in the harshest conditions. Meeting MIL-STD 810H US military standards, its rugged design doesn’t mean bulk weighing in at less than 3 pounds. With multiple ports for peripherals galore, the base model will still outperform most Chromebooks with an i3 processor. The premium model will exceed most users’ needs in Chromebook, with a blazing fast i7.
Asus Chromebook Flip CX5/C536
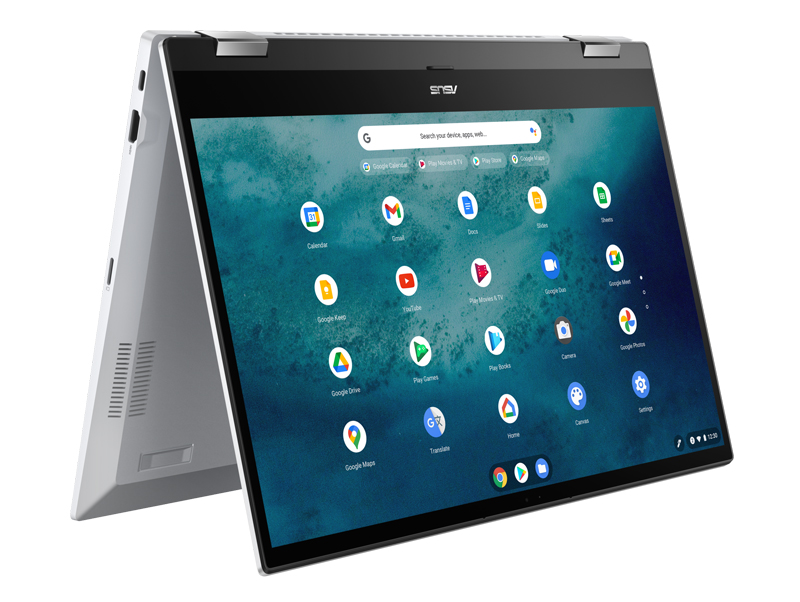
Photo Credit: Asus
Announced: January 2021 (not released)
Price Range: $500+
Processor: AMD Ryzen 3 3250C Processor 2.6 GHz or AMD Ryzen™ 5 3500C Processor 2.1 GHz
Battery: 10 hours
Memory: 4GB-8GB-16GB
Storage: 64GB eMMC, 128GB-256GB SSD
Screen: 15.6”
Resolution: 1920 x 1080
Convertible: Yes
Weight: 4.30 lb
The first Chromebook with the latest generation of Intel Core processors, the Asus Chromebook Flip CX5 performance matches its sleek aesthetic. With a large display, this convertible Chromebook is on the heavier side at 4+ lbs. This Chromebook also features a backlit keyboard with full numeric keypad and multiple ports for peripherals.
Asus Chromebook Flip CM5
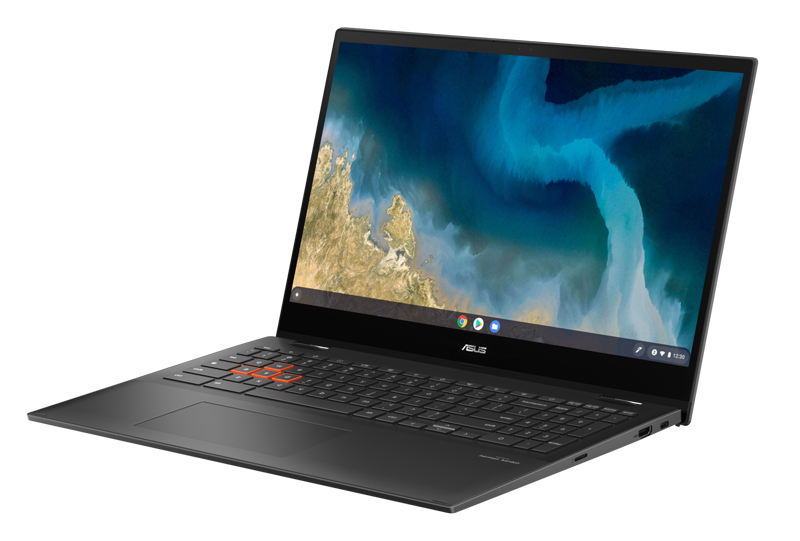
Photo Credit: Asus
Announced: Early 2021 (not released)
Price Range: $500+
Processor: AMD Ryzen 3 3250C Processor 2.6 GHz or AMD Ryzen™ 5 3500C Processor 2.1 GHz
Battery: 10 hours
Memory: 4GB-8GB-16GB
Storage: 64GB eMMC, 128GB-256GB SSD
Screen: 15.6”
Resolution: 1920 x 1080
Convertible: Yes
Weight: 4.30 lb
With bold orange accents, the Asus Chromebook Flip CM5 feels like a gaming laptop. Don’t be fooled by its sleek design—not one bit of performance is sacrificed for aesthetic. Weighing in at 4+ pounds, this convertible Chromebook is on the heavier side, but boasts a large display, full numeric keypad, and plenty of ports.
Updated: HP Chromebook x360 14c
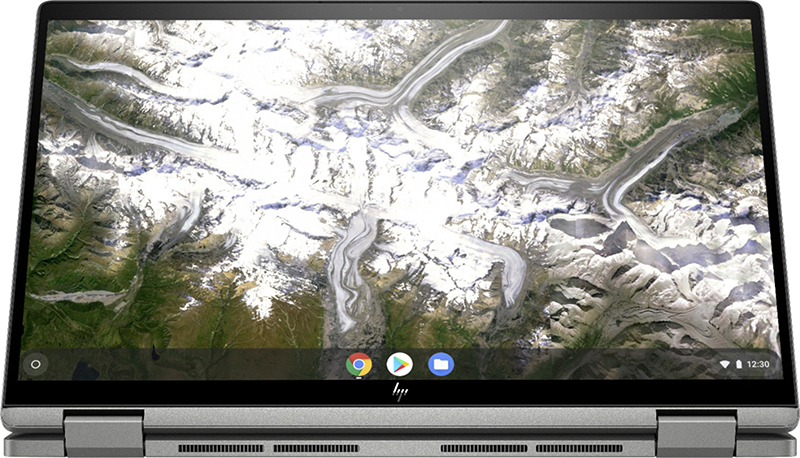
Photo Credit: HP
Released: March 2021
Price Range: $600+
Processor: Intel Core i3
Battery: 13.5 hours
Memory: 8GB
Storage: 64GB
Screen: 14”
Resolution: 1920 x 1080
Convertible: Yes
Weight: 3.64 lb
Updated for 2021 is the eleventh generation HP Chromebook x360 14c. With a business focus and a bit of flair, this Chromebook is equipped with a fingerprint reader for easy and secure access. Convertible to four modes, this model featured updated hinge construction. This Chromebook also features the HP fast-charging battery technology. Boasting 13.5 hours of battery life, it also charges from 0 to 50% in 45 minutes.
Samsung Galaxy Chromebook 2
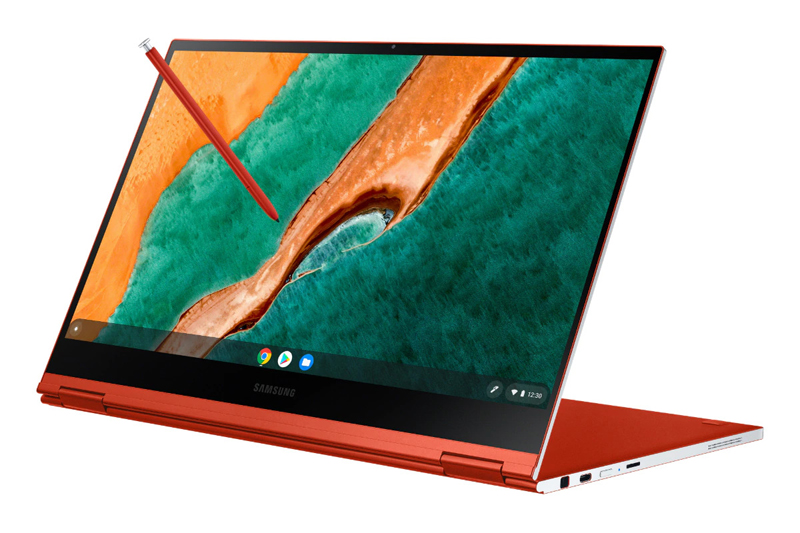
Photo Credit: Samsung
Released: March 2021
Price Range: $500+
Processor: Intel Celeron Processor 5205U or Intel Core i3
Battery: 13 hours
Memory: 4GB-8GB
Storage: 64GB-128GB
Screen: 13.3”
Resolution: 1920 x 1080
Convertible: Yes
Weight: 2.71 lb
The Samsung Galaxy Chromebook 2 is the world’s first QLED Chromebook. With a durable aluminum body and a battery that lasts all day, it’s perfect for users on the go. Designed to capture the best of work and play, this Chromebook easily converts to a tablet. Featuring a backlit keyboard and large keycaps, you’ll be able to type with precision even in low lighting.
AGParts Education supports 6,000+ innovative 1:1 school districts in Chromebook parts supply and technology buyback. Contact us today to see how we can help your school.

by AGParts Education | Chromebooks, Tips and Tricks
Chromebooks are a popular choice for one-to-one computing programs, but how do you decide which Chromebook is right for your school? Our Chromebook Spec Comparison chart can help you compare popular and new Chromebooks for education.
What is a Chromebook?
First introduced in June 2011, a Chromebook is a type of laptop that uses Chrome OS to run. Chromebooks are internet-heavy devices, and most activities occur online. This includes word processing, creating spreadsheets and slideshows, notetaking, etc. These docs are automatically saved to cloud storage via Google Drive. Chromebooks have limited internal storage and rely on cloud-based storage for most applications and data.
Google provides regular updates and security patches to Chromebooks until their Auto Update Expiration. With built-in virus protection, regular security updates, and cloud-based work, Chromebooks are extremely secure devices and less prone to viruses.
Why are Chromebooks so popular in schools?
Durable, affordable, secure, fast, easy to deploy—the list of pros goes on. According to 2018 data, 60% of K-12 devices purchased in the US were Chromebooks. Worldwide, Chromebooks came in first place for K-12 devices with 31% of educators reporting their use. In 2019, Google reported 40 million Chromebooks in use in education.
Bear in mind that this data is prior to the COVID-19 pandemic. The Chromebook’s popularity has exploded as more schools had to adjust to remote learning in 2020-2021 school years. There’s no sign that this Chromebook sales will be slowing anytime soon.
Remember that just like any device, there are pros and cons of a Chromebook. Be sure to do your research on different K-12 devices to ensure your students end up with the device that is best for them.
Chromebook Spec Comparison Chart
| Name |
Release |
Screen |
Resolution |
CPU Model |
CPU Speed |
Memory |
Storage |
Battery |
Weight (lbs) |
2-in-1 |
Touch |
| Acer Chromebook 314 |
2021 |
14 |
1366 x 768
1920 x 1080 |
Intel Celeron N4020 |
1.1 |
4GB |
32GB |
12 |
3.75 |
No |
No |
| Acer Chromebook 512 |
2021 |
12 |
1366 x 912 |
Intel Celeron N4020 |
1.1 |
4GB |
32GB |
12 |
3.09 |
No |
No |
| Acer Chromebook Spin 13 |
2021* |
13.3 |
1920 x 1080 |
Qualcomm Kryo 468 |
2.1 |
4-8GB |
64GB |
13.5 |
2.65 |
Yes |
Yes |
| Acer Chromebook Spin 511 |
2021 |
11.6 |
1366 x 768 |
Intel Celeron N4020 |
1.1 |
4GB |
32GB |
10 |
2.78 |
Yes |
Yes |
| HP Chromebook 11MK G9 EE |
2021 |
11.6 |
1366 x 768 |
MediaTek MT8183 |
2.0 |
4-8GB |
32-64GB eMMC |
12 |
2.95 |
No |
Available |
| HP Chromebook 11 G9 EE |
2021* |
11.6 |
1366 x 768 |
Intel Celeron N4500 or N5100 |
1.1 |
4-8GB |
32-64GB eMMC |
12 |
2.95 |
No |
Available |
| HP Chromebook x360 11MK G3 EE |
2021 |
11.6 |
1366 x 768 |
Intel Celeron N4020 |
1.1 |
4GB |
32GB eMMC |
12 |
3.19 |
Yes |
Yes |
| HP Chromebook x360 11 G4 EE |
2021* |
11.6 |
1366 x 768 |
Intel Celeron N4500 or N5100 |
1.1 |
4GB |
32-64GB eMMC |
12 |
3.19 |
Yes |
Available |
| HP Chromebook 14 G7 |
2021* |
14 |
1366 x 768
1920 x 1080 |
Intel Celeron N4500 or N5100 |
1.1 |
4-8GB |
32-64GB eMMC |
12 |
3.4 |
No |
Available |
| Lenovo 100E Gen 3 |
2021* |
11.6 |
1366 x 768 |
AMD 3015Ce |
1.2 |
4GB |
32GB eMMC |
10 |
2.76 |
No |
No |
| Lenovo 300E Gen 3 |
2021* |
11.6 |
1366 x 768 |
AMD 3015Ce |
1.2 |
4GB |
32GB eMMC |
10 |
2.9 |
Yes |
Yes |
| Lenovo 500E Gen 3 |
2021* |
11.6 |
1366 x 768 |
Intel Celeron N5100
Intel Pentium Silver N6000 |
|
8GB |
64GB eMMC |
10 |
2.9 |
Yes |
Yes |
| Lenovo 14e Gen 2 |
2021* |
14 |
1366 x 768
1920 x 1080 |
AMD 3015Ce |
1.2 |
4-8GB |
32-64GB eMMC |
10 |
3.2 |
No |
Available |
| Acer Chromebook 311 |
2020 |
11.6 |
1366 x 768 |
Intel Celeron N4020 |
1.1 |
4GB |
32GB |
10 |
2.43 |
No |
Available |
| Acer Chromebook Spin 311 |
2020 |
11.6 |
1366 x 768 |
MediaTek MT8183 |
2.0 |
4GB |
32-64GB |
15 |
2.65 |
Yes |
Yes |
| HP Chromebook 11 G8 EE |
2020 |
11.6 |
1366 x 768 |
Intel Celeron N4020 |
1.1 |
8GB |
32GB eMMC |
13.5 |
2.91 |
No |
No |
| Lenovo Chromebook Duet |
2020 |
10.1 |
1920 x 1200 |
MediaTek Helio P60T |
2.0 |
4GB |
64GB |
10 |
1 |
Yes |
Yes |
| Acer Chromebook 15 |
2019 |
15.6 |
1920 x 1080 |
Intel Pentium N4200 |
1.1 |
4GB |
32GB |
12 |
4.3 |
No |
No |
| Dell Chromebook 3100 |
2019 |
11.6 |
1366 x 768 |
Intel Celeron N4020 |
1.1 |
4GB |
16-32GB eMMC |
14 |
2.85 |
Available |
Available |
| HP 14A G5 |
2019 |
14 |
1366 x 768
1920 x 1080 |
AMD A4-9120C APU
AMD A6-9220C APU |
1.6
1.8 |
4GB |
16-64GB eMMC |
9 |
3.46 |
No |
Available |
| HP Chromebook x360 12b |
2019 |
12 |
1366 x 912 |
Intel Celeron N4020 |
1.1 |
4GB |
32GB |
13 |
2.98 |
Yes |
Yes |
| HP Chromebook 11 G7 EE |
2019 |
11.6 |
1366 x 768 |
Intel Celeron N4000
Intel Celeron 4100 |
1.1 |
4-8GB |
16-64GB eMMC |
13 |
2.93 |
No |
Available |
| Lenovo Chromebook C340 |
2019 |
11.6 |
1366 x 768 |
Intel Celeron N4000 |
1.1 |
4GB |
64GB |
10 |
2.65 |
Yes |
Yes |
| Samsung Chromebook 4+ (15-inch) |
2019 |
15.6 |
1920 x 1080 |
Intel Celeron N4000 |
1.1 |
4GB |
32GB+ |
10 |
3.75 |
No |
No |
*At date of publication, these models have been announced, but have not been released.
AGParts Education supports 6,000+ US school districts with their 1:1 Chromebook initiatives. From Chromebook parts to technology buyback, contact us to see how we can help your district.
by AGParts Education | Acer, Announcements, Chromebooks, Education Technology, HP, Lenovo
The Chromebook has become the most popular device used for 1:1 computing programs worldwide. Both Acer, HP, and Lenovo announced exciting new Chromebook models for both students and teachers in early 2021.
Check out these new Chromebook models currently available or coming soon to retailers:
For Students
Acer Chromebook Spin 512
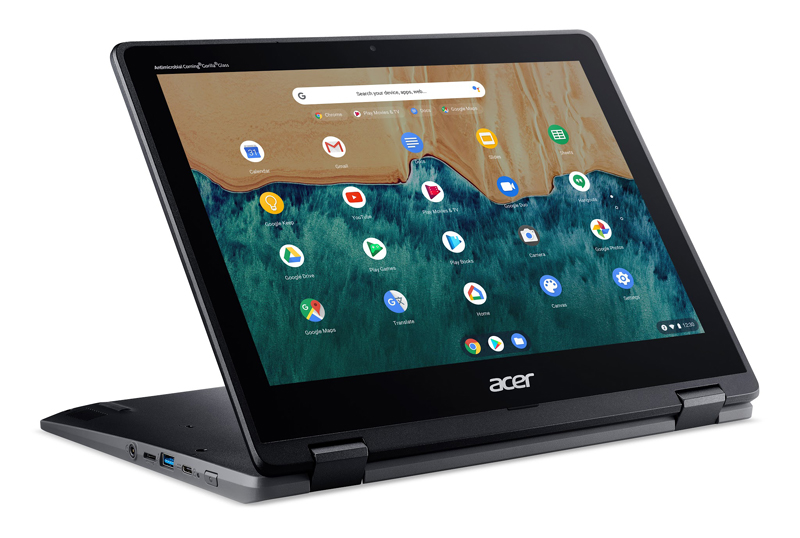
Photo Credit: Acer
Released: January 2021
Price Range: $450-550
Processor: Intel Celeron N4120 1.1 GHz or Intel Pentium Silver N5030 1.1 GHz
Battery: 11 hours
Memory: 4GB-8GB
Storage: 32GB-64GB eMMC
Screen: 12.0”
Resolution: 1366 x 912
Convertible: Yes
Touch: Yes
Weight: 3.42 lb
Ports: (2) USB-C port, (2) USB-A 2.0 port
The Acer Chromebook Spin 512 is the first Acer Chromebook to come equipped with standard antimicrobial treatment on the glass display, keyboard, and touchpad. With an increased display size and 3:2 aspect ratio for more vertical viewing, it’s the perfect Chromebook to view documents, read, and power through assignments. Durable for students, its keyboard is protected against small spills and is MIL-STD 810H tested.
Updated: Acer Chromebook Spin 511 (R752T-C2YP)
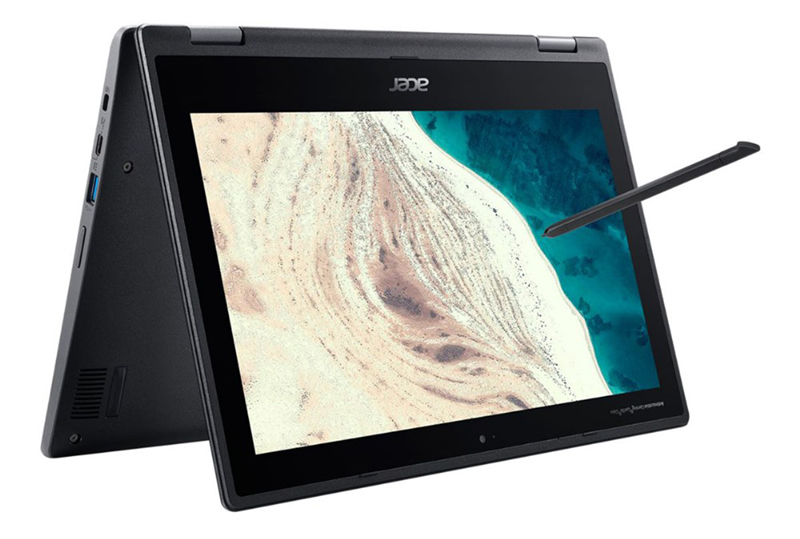
Photo Credit: Acer
Released: April 2021
Price Range: $400
Processor: Intel Celeron N4020 1.1 GHz
Battery: 10 hours
Memory: 4GB
Storage: 32GB
Screen: 11.6”
Resolution: 1366 x 768
Convertible: Yes
Touch: Yes
Weight: 2.78 lb
Ports: (2) USB-C port
New Model: R752T-C2YP
Recently updated and bearing a lower price tag than the previous 511 models, the Acer Chromebook Spin 511 is a versatile 2-in-1 that packs a powerful punch. Impact and pressure resistant with a shock absorbent rubber bumper, it will withstand the most aggressive handling from young hands. With four convertible modes—clamshell, tablet, display, and tent—students can work in a variety of ways.
Updated: Acer Chromebook 311
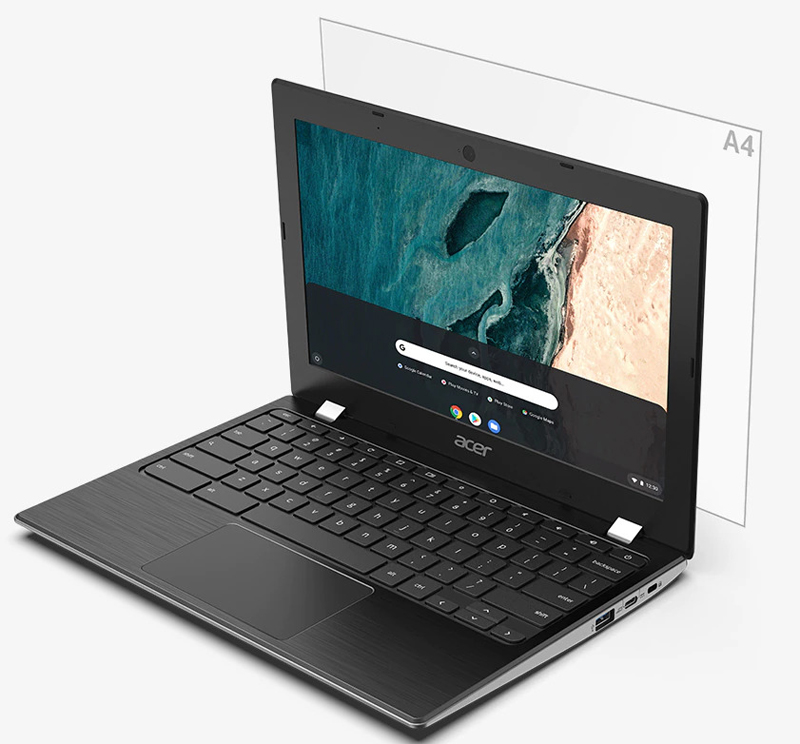 Photo Credit: Acer
Released: November 2020
Price Range: $150-300
Processor: Intel Celeron N4020 1.1 GHz
Battery: 10 hours
Memory: 4GB
Storage: 32GB
Screen: 11.6”
Resolution: 1366 x 768
Convertible: No
Touch: Available
Weight: 2.43 lb
Ports: (2) USB-C port, (2) USB-A 2.0 port
New Models: CB311-9H-C7C8, CB311-9H-C4XC, CB311-9HT-C7SE
The Acer Chromebook 311 features three new models in its series, with the CB311-9H-C4XC model available at $169*. Smaller than a sheet of A4 paper, this lightweight laptop is perfect for hybrid model instruction and on-the-go students. Easily one of the most affordable Chromebooks on the market, it offers many features while staying in budget.
HP Chromebook 11MK G9 EE & HP Chromebook 11 G9 EE

Photo Credit: HP
HP Chromebook 11MK G9 EE
Released: January 2021
Price Range: $200-300
Processor: MediaTek MT8183 2.0 GHz
Battery: 12 hours
Memory: 4GB-8GB
Storage: 32GB-64GB eMMC
Screen: 11.6”
Resolution: 1366 x 768
Convertible: No
Touch: Available
Weight: 2.95 lb
Ports: (2) USB-C port, (1) USB-A 2.0 port, (1) Headphone/microphone combo jack
HP Chromebook 11 G9 EE
Announced: January 2021 (not released)
Price Range: Not available
Processor: Intel Celeron Processor N4500 or N5100 1.1 GHz
Battery: 12 hours
Memory: 4GB-8GB
Storage: 32GB-64GB eMMC
Screen: 11.6”
Resolution: 1366 x 768
Convertible: No
Touch: Available
Weight: 2.95 lb
Ports: (2) USB-C ports, (2) USB-A ports, (1) headphone/microphone combo jack
The HP Chromebook 11MK G9 EE and the HP Chromebook 11 G9 EE are near identical save the processors and additional USB-A port in the second model. Built for the wear and tear of student life, these Chromebooks meet MIL-STD 810H standards and can withstand drops from four feet. With long-lasting batteries that can charge to 90% within 90 minutes, your students’ productivity will seldom be interrupted.
HP Chromebook x360 11MK G3 EE

Photo Credit: HP
Released: January 2021
Price Range: $300-400
Processor: Intel Celeron N4020 1.1 GHz
Battery: 12 hours
Memory: 4GB
Storage: 32GB eMMC
Screen: 11.6”
Resolution: 1366 x 768
Convertible: Yes
Touch: Yes
Weight: 3.19 lb
Ports: (2) USB-C ports, (2) USB-A ports, (1) headphone/microphone combo jack
Your students will learn from every angle with the convertible HP Chromebook x360 11MK G3 EE. Designed to withstand the demands of student life, this Chromebook can survive a fall and is spill resistant. The superior performance from the Intel processor and long battery life is sure boost your students’ productivity.
HP Chromebook x360 11 G4 EE
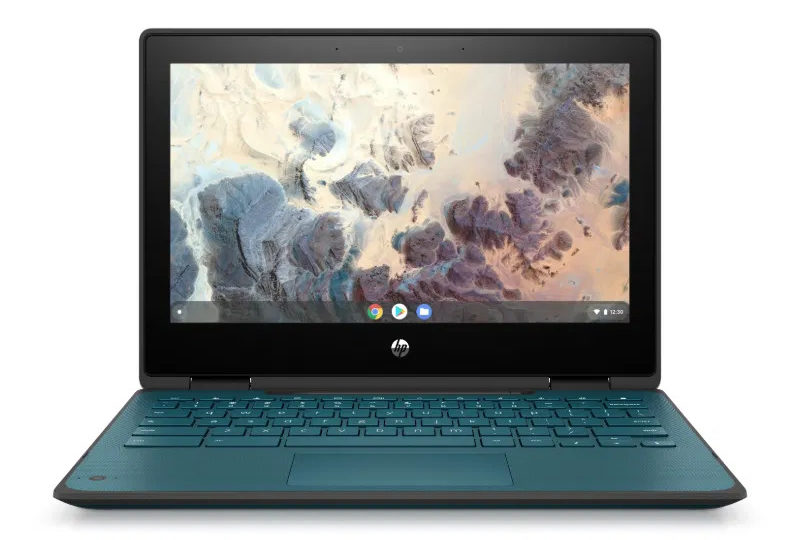
Photo Credit: HP
Announced: January 2021 (not released)
Price Range: Not available
Processor: Intel Celeron Processor N4500 or N5100 1.1 GHz
Battery: 12 hours
Memory: 4GB
Storage: 32GB-64GB eMMC
Screen: 11.6”
Resolution: 1366 x 768
Convertible: Yes
Touch: Available
Weight: 3.19 lb
Ports: (2) USB-C ports, (2) USB-A ports, (1) headphone/microphone combo jack
A ruggedized Chromebook with an ultrawide HD camera, the HP Chromebook x360 11 G4 EE will keep up with even the most active students. Featuring a spill-resistant keyboard, this Chromebook also features a garaged stylus that can be stored and charged within the device. Available in either black or teal, it comes equipped with a battery that lasts all day and charges up to 90% in 90 minutes when powered off.
For Teachers & Higher Education
Acer Chromebook Spin 513
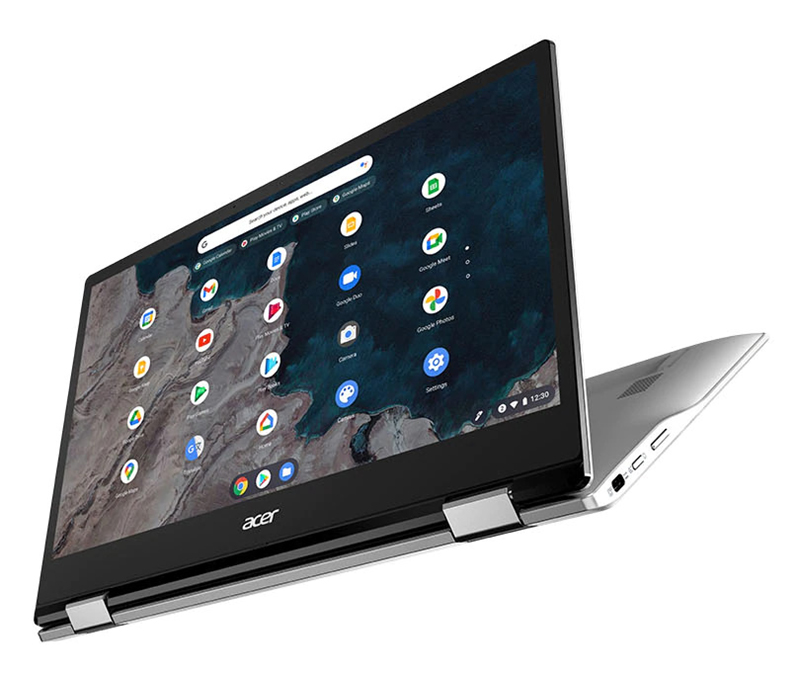
Photo Credit: Acer
Announced: February 2021 (not released)
Price Range: $500-550
Processor: Qualcomm Kryo 468 Octa-Core 2.1 GHz
Battery: 13.5 hours
Memory: 4GB-8GB
Storage: 64GB
Screen: 13.3”
Resolution: 1920 x 1080
Convertible: Yes
Touch: Yes
Weight: 2.65 lb
There’s a lot for teachers to like about the Acer Chromebook Spin 513. Stylish in design, it features a narrow bezel and stunning display. With a battery to power through even the longest days, teachers can easily switch between clamshell and tablet modes to easily meet their needs.
Updated: Acer Chromebook 314
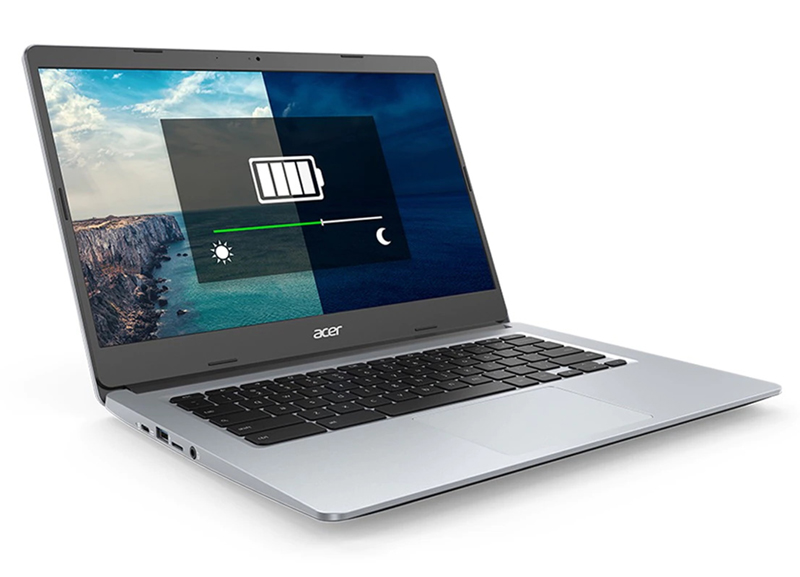
Photo Credit: Acer
Announced: February 2021
Price Range: $200-450
Processor: Intel Celeron N4020 1.1 GHz
Battery: 12 hours
Memory: 4GB
Storage: 32GB
Screen: 14”
Resolution: 1366 x 768, 1920 x 1080
Convertible: No
Touch: Not available in the updated models
Weight: 3.75 lb
Ports: 2) USB-C port, (2) USB-A 2.0 port
New Models: CB314-1H-C02A, CB314-1H-C7W8
The updated Acer Chromebook 314 is budget friendly laptop with no frills. With a larger 14” display, it is focused on productivity and performance. A bit heavier than most Chromebooks, your teachers can power through their days on a single charge. With model CB314-1H-C7W8 available for $199*, it’s going to be tough to find another comparable Chromebook at this price point.
Acer Chromebook 512
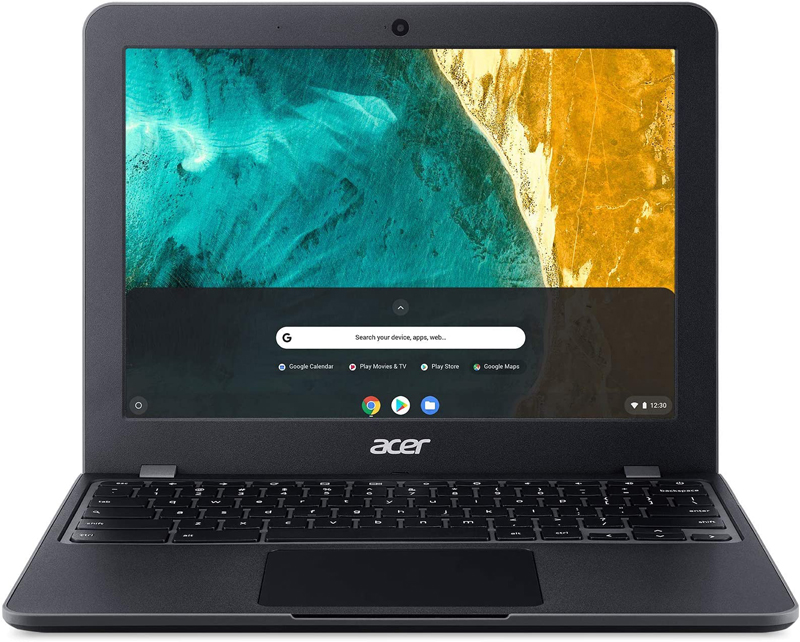
Photo Credit: Acer
Announced: February 2021
Price Range: $200-300
Processor: Intel Celeron N4020 1.1 GHz
Battery: 12 hours
Memory: 4GB
Storage: 32GB
Screen: 12”
Resolution: 1366 x 912
Convertible: No
Touch: No
Weight: 3.09 lb
Ports: (2) USB-C port, (2) USB-A 2.0 port
Meeting MIL-STD 810G requirements, the Acer Chromebook 512 is designed to withstand the rigors of the harshest school environments. Like its Spin counterpart, this Chromebook features a 3:2 aspect ratio for more vertical viewing making it ideal for viewing documents and reading. Its keyboard is protected against small spills with a unique drainage design. At a price that can’t be beat, it’s a great fit for students and teachers alike.
HP Chromebook 14 G7
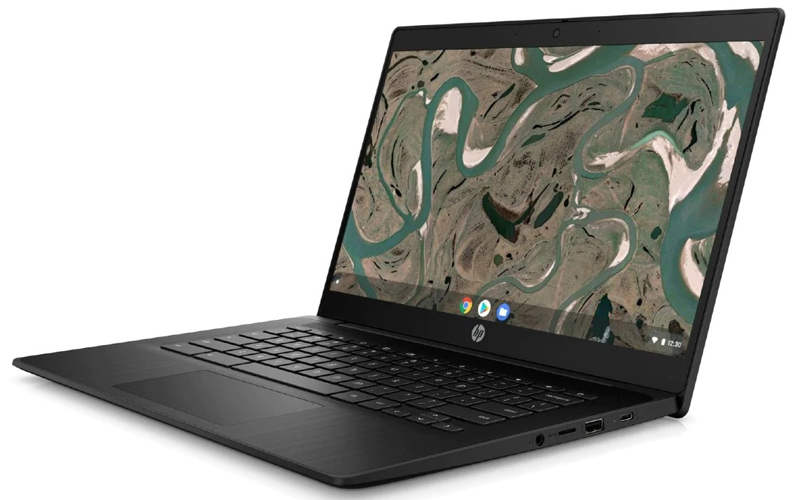
Photo Credit: HP
Announced: January 2021 (not released)
Price Range: Not available
Processor: Intel Celeron Processor N4500 or N5100 1.1 GHz
Battery: 12 hours
Memory: 4GB-8GB
Storage: 32GB-64GB eMMC
Screen: 14.0”
Resolution: 1366 x 768, 1920 x 1080
Convertible: No
Touch: Available
Weight: 3.4 lb
Ports: (1) USB-C ports, (2) USB-A ports, (1) headphone/microphone combo jack
Designed for teachers, the HP Chromebook 14 G7 features a larger screen and ultra-wide HD webcam to adapt to any learning environment. Built to survive drops, is also made to be cleaned, withstanding up to 1,000 disinfection cycles. While it is not a fully convertible Chromebook, it does feature a 180-degree hinge.
Added May 2021
Updated: Lenovo 100e Chromebook Gen 3

Photo Credit: Lenovo
Announced: March 2021 (coming soon)
Price Range: Not available
Processor: AMD 3015Ce 1.2 GHz
Battery: 10 hours
Memory: 4GB
Storage: 32GB eMMC
Screen: 11.6”
Resolution: 1366 x 768
Convertible: No
Touch: No
Weight: 2.76 lb
Ports: (1) USB-C ports, (2) USB-A ports, (1) HDMI port, (1) headphone/microphone combo jack
The Lenovo 100e Gen 3 is everything your students need without any frills. Reinforced ports and hinges combined with rubber bumpers ensure this device can handle drops from more than two feet. Equipped with plenty of ports for peripherals, your students won’t miss a beat with this Chromebook.
Updated: Lenovo 300e Chromebook Gen 3 2-in-1
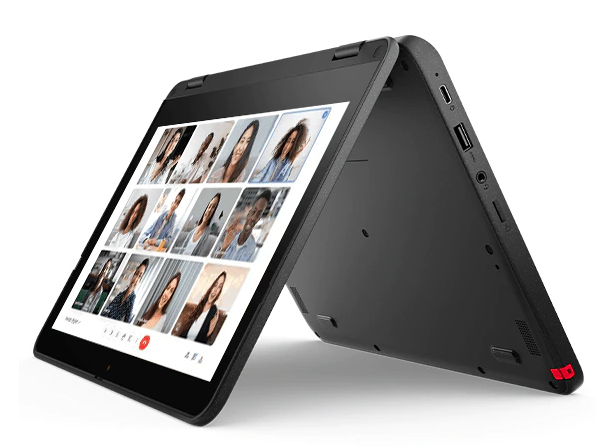
Photo Credit: Lenovo
Announced: March 2021 (temporarily unavailable)
Price Range: Not available
Processor: AMD 3015Ce 1.2 GHz
Battery: 10 hours
Memory: 4GB
Storage: 32GB eMMC
Screen: 11.6”
Resolution: 1366 x 768
Convertible: Yes
Touch: Yes
Weight: 2.9 lb
Ports: (1) USB-C ports, (2) USB-A ports, (1) HDMI port, (1) headphone/microphone combo jack
Rugged and water resistant, the Lenovo 300e Gen 3 2-in-1 features plenty of ports and all-day battery life to ensure productivity is uninterrupted. With optional garaged stylus, this 2-in-1 has a 360-degree hinge that enables multiple modes. Meeting MIL-SPEC-810H requirements, you can rest easy knowing this device can withstand the demands of student life, whether at a school desk or at a kitchen table.
Updated: Lenovo 500e Chromebook Gen 3 2-in-1
Photo Credit: Lenovo
Announced: March 2021 (temporarily unavailable)
Price Range: Not available
Processor: Intel Celeron Processor N5100 or 1.2
Battery: 10 hours
Memory: 8GB
Storage: 64GB eMMC
Screen: 11.6”
Resolution: 1366 x 768
Convertible: Yes
Touch: Yes
Weight: 2.9 lb
Ports: (1) USB-C ports, (2) USB-A ports, (1) HDMI port, (1) headphone/microphone combo jack
Let creativity flow with the Lenovo 500e Gen 3 2-in-1. With optional garaged stylus and all-day battery life, students will be engaged and thrive while using this device. Featuring four convertible modes, this Chromebook is ideal for sharing content and collaboration. Meeting MIL-SPEC-810H requirements, it has rubber bumpers, reinforced ports and hinges, and a water-resistant keyboard that tolerates spills up to 12 oz.
Lenovo 14e Gen 2 Chromebook
Photo Credit: Lenovo
Announced: March 2021 (temporarily unavailable)
Price Range: Not available
Processor: AMD 3015Ce 1.2 GHz
Battery: 10 hours
Memory: Up to 8GB
Storage: Up to 64GB eMMC
Screen: 14”
Resolution: 1366 x 768, 1920 x 1080
Convertible: No
Touch: Available
Weight: 3.2 lb
Ports: (1) USB-C ports, (2) USB-A ports, (1) HDMI port, (1) headphone/microphone combo jack
The Lenovo 14e Gen 2 Chromebook is a student workhorse. Meeting MIL-SPEC-810H requirements, this Chromebook can keep up with the fast-paced lifestyle of any student or teacher without crumbling. With a battery that lasts all day and a 180-hinge, you can be sure that productivity will not be interrupted.
*Pricing may vary. Pricing current as of date of publication.
AGParts Education is your complete partner for your 1:1 Chromebook initiative. Supporting over 6,000+ U.S. school districts, find out how we can help your district. Contact us today!

by AGParts Education | Chromebooks, Tips and Tricks
Chromebooks have become a popular choice for 1:1 programs across the U.S. In fact, 30 million students and educators used Chromebooks in 2019 alone. Their popularity continues to surge as more schools rely on their hybrid instruction. There are a host of benefits of Chromebooks in the classroom, but what are the overall pros and cons of a Chromebook?
Pros of a Chromebook
They’re sleek, lightweight, and fast. But there’s so much more to a Chromebook.
Secure & Fast
Chromebooks are extremely secure and fast due to regular auto updates devices receive until their Auto Update Expiration (AUE). This means your Chromebook will receive software updates, vital security patches, and technical support for six-a-half to eight-and-a-half years depending on AUE.
Low Price & Low Lifetime Cost
One of the best things about Chromebooks is the price tag. It simply can’t be beat. More expensive Chromebooks do exist, but you can still find a solid Chromebook for under $300—considerably less than their laptop counterpart. This is a significant factor for any school’s yearly budget.
Additionally, the lifetime cost of a Chromebook is low because Chromebooks don’t have the traditional moving parts that a laptop does. This means less mechanical malfunction and less need for repair, saving your district in the long term.
Integrated Virus Protection
Not only are Chromebooks less vulnerable to viruses, but their antivirus/malware protection is built into the Chrome OS. This is an additional cost savings, not to mention the time it saves your IT team in troubleshooting.
Little Maintenance
Since Chromebooks do not rely on software, there is no need for your IT team to install, update, support, or troubleshoot software. Updates are automatic via Google and a 24/7 helpdesk is available to Google Workspace subscribers. This unburdens your IT department and frees them to handle more pressing matters.
Collaborative & Built for Productivity
Chromebooks encourage collaboration, which is fantastic for both teachers and students. Chromebooks use Google Workspace, Google’s answer to Microsoft 365, and docs can be edited in real time by multiple users.
Chromebooks also rely heavily on keyboard shortcuts. Once learned, they are sure to boost productivity.
Additionally, there are few frivolous distractions on a Chromebook, as compared to a laptop, which encourages students’ productivity. Of course, we aren’t ruling out the fact that the internet can be a huge distraction, but we’ll let you decide how to monitor and restrict access to certain websites.
Mobile & Shareable
If the past year is any indication, a Chromebook’s mobility is a particularly compelling feature. They are very easy to transport since they are lightweight. If students need to bring their devices home, it’s easy to do so.
They’re also easy to share, making them ideal for schools that are working toward a 1:1 program. Chromebooks require a Google account for every user. Since Chromebooks rely on cloud-based storage, files are easily accessed via your personal login. When sharing, all students need to do is sign into their own account for a personal learning experience.
Cons of a Chromebook
As with any laptop or notebook, there are certain cons associated with a Chromebook.
No Microsoft 365*
For Chromebooks launched prior to 2019, Microsoft 365 cannot be installed. Instead, your teachers and students will use the Google Workspace which features Google Doc (Word), Google Sheets (Excel), and Google Sheets (PowerPoint), among other correlating applications.
This means there is an associated learning curve with this set of applications. Even though they are remarkably similar to Microsoft counterparts, there are still differences in commands and functionality. This could be less of an issue for younger generation of students as they have less familiarity with Microsoft apps. This could be more of an issue for teachers and older students as they transition to Google Workspace from Microsoft.
The good news is that files from all Google Workspace applications can be downloaded as their Microsoft counterpart, which proves helpful.
*However, Chromebook with a launch date after 2019 support apps designed for Android mobile use. This means Microsoft 365 is available via Google Play for Chrome. Check this list to ensure your Chromebook model supports this feature.
Limited Functionality Offline
With teachers reporting that 12% of students have no access to the internet at home, this could be huge factor depending on your district. Because most work occurs in browser-based applications, collaborative, real-time exercises will require an internet connection. If they don’t have internet access, this could impact you’re their experience.
Working offline with a Chromebook is not impossible, it just requires planning. There is still a workaround for this. Many apps feature offline settings, which need to be turned on. Students can edit docs offline, and when they are online again, edits will be synced.
Not Ideal for Multimedia Projects
Currently, the best software and applications for audio and video projects are not web based. There are plenty of web-based video editors and other applications that can provide a solid workaround.
This most likely is not a contributing factor for most districts, but could affect older students in journalism and broadcasting, music, or theater programs.
AGParts Education supports 6,000+ innovative 1:1 school districts in Chromebook parts supply and technology buyback. Contact us today to see how we can help your school.

by AGParts Education | Chromebooks, Education Technology
Is your school considering implementing a 1:1 Chromebook program? If so, you may be curious about Chromebooks and how they stack up to their competition. Today, we’ll look at that and more, including the benefits of Chromebooks in the classroom.
History of 1:1 Computing
Before we explore the benefits that Chromebooks can bring to your school, let’s look back at the history of 1:1 computing.
One-to-one computing is exactly what it sounds like—it is one computer for every student. Technology was first introduced in education in the 1920s when radio made lessons available to students within listening range. Since then, it’s been milestone after milestone as technology continues to be widespread across all schooling levels.
In the late 1990s, 1:1 programs were first introduced. In those early years, primary schools favored Apple devices while secondary schools favored Windows devices. Type of device is contingent upon many factors: age of students, budget, and benefits.
It’s estimated that 40% of US schools have a 1:1 program, with another 30% of schools having at least one device for five or less students. Despite the popularity of 1:1 programs, one statistic remains particularly troublesome: teachers report that 12% of students don’t have access to the internet or computer at home. In a world where technology dominates, 1:1 programs are a lifeline for these learners to prepare them for the future.
History of 1:1 Chromebook Programs
One-to-one programs saw two major tech inventions that rocked them to their core: the release of the iPad in 2010 and the release of the Chromebook in 2011.
There’s no denying the Chromebook’s universal popularity by schools and consumers alike. A streamlined, internet-heavy laptop with a price tag that can’t be beat, 30 million students and educators used Chromebooks in 2019 alone. After 2020, their popularity has only grown. The Chromebook was first introduced in the classroom in 2012 as Google began to pilot the device in schools nationwide. By 2014, Chromebook surpassed iPads in sales.
Benefits of Using Devices in the Classroom
With a reported 95% of teachers using technology in the classroom, it’s no secret that its presence is here to stay. When speaking about the benefits a specific device, it’s important to differentiate between benefits only that device can bring versus the overall benefits of using devices in the classroom, and largely the benefits of technology in education. Here’s a closer look at five of those benefits:
Provides Access
With 12% of students across the country with no access to the internet or a computer at home, devices in the classroom provide access to students that would otherwise not have it.
Transforms Ordinary Lessons
Using video or an interactive activity can make a boring subject more palatable to students and engage disinterested learners.
Assists with Student Comprehension
Technology-based learning incorporates different learning styles, which allow for students to tackle difficult subject according to their needs.
Prepares Students for the Future
College and career readiness is paramount for a student, and use of technology in the classroom will no doubt better prepare them for any digital demands the future brings.
Collaboration & Connection
Students are not only able to collaborate with their fellow classmates, removing the singularity of learning, but also with students on the other side of the globe. More importantly, technology-based education gives a voice to the voiceless—from shy students to students with learning disabilities, devices enable these students to connect in ways that aren’t possible previously.
Benefits of Chromebooks in the Classroom
Chromebooks continue to be a popular choice given their low-price tag and ease of use. How do they compare to the competition, and why choose a Chromebook over another device? Here’s a look at six benefits that Chromebooks bring to the classroom.
Easy to Use
How about a computer that boots in under ten seconds? With a Chromebook, you’re hard pressed to find a device that is easier to use. From long battery life to integrated virus protection, the only interruption students and teachers experience will be the bell ringing with these devices.
Ideal for Sharing
If your school doesn’t have the budget for one device to every student, Chromebooks are a great shareable device. Chromebooks require a Google account for every user and are cloud-based devices. When sharing, all students need to do is sign into their account for a personal learning experience.
Low Price Tag and Low Cost of Ownership
With some school-friendly Chromebooks starting at $99, there’s no denying their value. Since Chromebooks are very lean laptops (few components and parts), they are generally have very low cost of ownership.
Low Maintenance
As just mentioned, Chromebooks have few moving parts—few components—which means they are easier to maintain than other devices. Beyond hardware, Google delivers all auto updates until the model reaches its AUE. With built-in virus and malware protection, you have peace of mind knowing your computer is protected.
Long Battery
A huge draw for Chromebooks is that they don’t draw battery life quickly. Some models can last 13 hours (almost two school days!) on a single charge.
Offline Capabilities
Don’t be fooled—yes, Chromebooks are internet-heavy laptops, but students can still use a Chromebook offline. In fact, there’s many ways to use a Chromebook offline.
AGParts Education partners with 6,000+ innovative 1:1 school districts nationwide in Chromebook parts procurement and buyback. For more info, contact us today!
by AGParts Education | Buyback, Chromebooks, Tech Ed
If your school has a 1:1 Chromebook program, chances are there will be a need to refresh your devices at some point. A great option when renewing your devices is to resell your old devices through Chromebook buyback. AGParts Education has a comprehensive technology buyback program that specializes in Chromebook buyback.
Today, we’ll discuss what Chromebook buyback is, the models with the highest resell value, and what to look for in a buyback company.
What is Chromebook Buyback?
Chromebook buyback is the process of selling back your used devices to a company that processes used electronics devices. That company will evaluate your devices and assign a value to each device.
Buyback falls under the umbrella of IT asset disposition (ITAD). ITAD is the process of disposing of used or unwanted IT assets in a safe and environmentally responsible manner. This includes securely wiping data of the devices prior to disposal.
Note that “disposed of” doesn’t mean thrown in the general waste stream. Many electronic parts and components are harmful to the environment. Sometimes, parts can be recycled, reused, or donated—one method of disposal. Even if the part has no useful value, there are certain protocols that must be followed to ensure safe disposal.
Best Models to Resell
Just as certain vehicles hold more value and garner more money when resold, the same is true of Chromebooks. So, which models have the best resell value, akin to the power of a Honda or Subaru?
Here are a dozen popular Chromebook models that carry high resell value:
- Acer C732
- Acer C733
- Dell 3100 models
- HP 11 G6 models
- HP 11 G7 models
- HP 11A G6 EE
- HP 11A G7 EE
- HP 14A G5
- HP 14 G5
- Lenovo 100E
- Lenovo 300E
- Lenovo 500E
Bear in mind that this is not a comprehensive list. If your school’s model is listed above, that doesn’t mean your school is guaranteed to recoup high value for your used devices. Likewise, if your school’s models aren’t listed, it doesn’t mean they’re worthless! Remember your used devices will be evaluated and assigned a monetary value based on condition. Even if your school has old models, buyback is always a worthwhile process to pursue as older models do hold value.
What to Look for in a Tech Buyback Company
Now that we’ve reviewed the most popular models, is your school ready to start the tech buyback process? If you answered “yes,” it’s crucial to do your research. Here are four things to look for in a buyback company.
#1: Experience
Since Chromebooks aren’t even ten years old, it can sometimes be difficult to find an experienced buyback company. Still, this should not be overlooked. Experience means peace of mind knowing that this isn’t the company’s first rodeo. Experience can also translate into more money for your used fleet.
AGParts Education has been in the classroom since devices were introduced. We even worked with Council Bluffs School District, one of the first schools to pilot a 1:1 program. Not to mention the fact that we’ve operated in the computer hardware industry since 2000. Plus, we process tens of thousands of used Chromebooks via buyback every year.
#2: Certifications & NIST Compliance
To ensure a company does recycle used devices safely and sustainably, they should hold certain national and international certifications. At the very minimum, they should hold ISO 14001 (environmental management) and R2 certifications (responsible electronics recycling). They also hold ISO 9001 (quality management) and 45001(occupational health and safety) certifications.
Additionally, they have to comply with National Institute of Standards and Technology (NIST). Sensitive info lives on our devices. When we recycle those devices, that data doesn’t magically disappear. Your devices must be wiped clean according to NIST guidelines to ensure your student data is protected.
We hold all four ISO and R2 certifications. We fully comply with NIST guidelines and issue data privacy certificates upon completion.
#3: Simple Process & Flexibility
The last thing the buyback process should do is give you a headache. The process should be simple and smooth. At the same time, buyback companies should be flexible to work with you and accommodate the needs of your school.
Our three-step process is truly hassle free.
- Request a quote for your used devices.
- Upon quote approval, ship your devices to AGParts Education (we’ll provide free boxes).
- Redeem your cash or technology department credit.
We also have flexible options—you can even finalize all the details of your buyback deal in advance and send your devices later. Our payment options include cash or credit. When your district chooses credit, you earn 10% more and guarantee those funds stay in your technology budget.
#4: Partnership
When looking for a Chromebook buyback company, you really want to look at a company that will be with you from start to finish. This can mean many things, but really it comes down to the company viewing you as a valuable partner and not just a number.
We view our customers as partners. You’ll have a dedicated account executive by your side every step of the way. To top it off, we send you all the materials to ship your devices and cover all freight costs.
In short, AGParts Education offers a Chromebook buyback process that is designed to make your life easier. When your district is ready to recycle devices, contact us or request a quote today.
Recent Comments